Click here to proceed toYOUR CART / CHECKOUT
We Are In the Process of Building Our New Site. If You Have Any Questions Please call us: (909) 923-6563

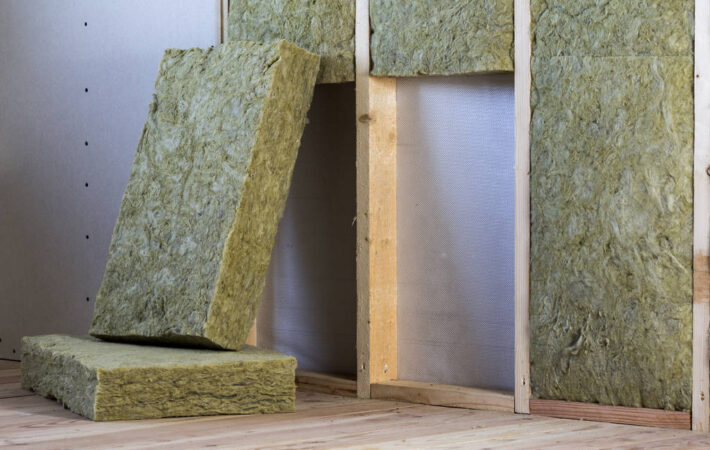
Different Types of Fiberglass Materials Explained

The new tech arrives at Bay 2 just as the day’s job ticket lands with a heavy slap.

“Tomorrow we start a run of chemical-resistant housings,” the supervisor says. “Before you touch resin, you need to understand the different types of fiberglass materials—what they do, what they hate, and what they quietly save you from.”

A cart rolls over. On it: five reinforcement samples, five very different personalities.
“Fiberglass isn’t one thing,” the supervisor says. “It’s a family. And families have characters.”

This article follows one shift where those characters come alive—not in a datasheet, but in a real shop where choosing the wrong reinforcement means rework, callbacks, or a very expensive education.


Morning Briefing — Meet the Cast of Fiberglass Reinforcements

The supervisor lines them up like a police lineup:

1. Chopped Strand Mat (CSM)

A messy-looking pad of random fibers.
“Good for bulk, curves, and beginners. Think of CSM as dough—it fills space, hides sins, and soaks resin fast.”

2. Woven Cloth

Smooth, predictable, almost polite.
“Cloth is structure. Clean load paths, clean cosmetics. It’s the ‘I do exactly what you tell me’ option.”

3. Woven Roving

Thick, rope-like weave.
“Big span? High pull-out? Roving is the spine. But it fights corners like a stubborn mule.”

4. Unidirectional (UD) Fiberglass

Fibers running almost entirely in one direction.
“This stuff is a sledgehammer… but only forward. Turn it 90 degrees, and it’s a wet noodle.”

5. Surface Veil

Barely visible, like tissue.
“Not strength—finish. UV armor, corrosion shield, print-control blanket. Veil is the difference between pretty and punished.”

The tech lifts each one, surprised by how different they feel.

“Knowing the different types of fiberglass materials,” the supervisor says, “is like knowing which wrench fits which bolt. Guessing only works once.”


Morning Lesson — The Rules Behind the Materials

The supervisor gestures for the tech to follow into the whiteboard area. “Now that you’ve met them,” he says, “let’s talk about how they behave once resin hits, and the clock starts ticking.”

Whiteboard out. Coffee steaming.

Rule 1 — Mat wets out by feel.
When it turns glossy and air flees the surface, it’s ready.

Rule 2 — Cloth obeys orientation.
Turn fibers in the direction the load will travel.

Rule 3 — Roving is never subtle.
It demands resin and rewards thickness.

Rule 4 — UD is a sniper.
One direction, lethal strength.

Rule 5 — Veil protects the story you want the part to tell.
Hide weaves, resist UV, fight chemicals.

“These aren’t definitions,” the supervisor says. “They are consequences.”

The tech nods slowly—finally connecting the tactile impressions from earlier to the logic behind them.


Hands-On Scene — When Reinforcements Hit Real Geometry

Back at the bench, the mold waiting for prep has long sweeping edges, tight bolt bosses, and a complex draft pattern. The tech frowns. “This looks like trouble.”

“It’s a conversation,” the supervisor replies. “Geometry tells you what reinforcement it wants—if you’re listening.”

Scenario 1: Large curved panel

Best pick: Mat + cloth

  • Mat conforms without fighting.
  • Cloth straps curve so it holds shape under wind load.

As the tech presses mat into the curve, it drapes willingly, settling into place. Cloth, however, needs steady coaxing from the roller before it commits to the shape.

Scenario 2: Deep radius corner with bolt pattern

Best pick: Mat + veil + localized UD

  • Mat smooths the bend.
  • UD resists bolt pull-out.
  • Veil hides the warp from curing stresses.

The supervisor guides the tech’s hand as UD is worked around the boss. “Feel that resistance?” he says. “That’s strength—but only if you help it wrap.”

Scenario 3: Long, flat span on a rooftop housing

Best pick: Roving + cloth

  • Roving carries bending loads.
  • Cloth keeps the panel from twisting like a paddle.

The roving thuds into place as the tech presses it flat. “Hear that?” the supervisor asks. “That’s stiffness announcing itself.”

“Material choice is never random,” the supervisor says. “Every layer responds to a threat.”


Material Comparison Table — Strengths, Weaknesses & Best Uses

Fiberglass Material TypeStrengthsWeak SpotsBest UsesWhy It Matters
Chopped Strand MatConforms easily, smooth finishLow directional strengthCurves, first layers, cosmetic skinsControls print-through and bridges imperfections
Woven ClothHigh multidirectional strengthLess forgiving on cornersGeneral structural layers, panelsBalanced stiffness and predictable performance
Woven RovingExcellent tensile & flexural strengthDifficult on tight shapesSpans, frames, stiffenersReduces sag and boosts load capacity
Unidirectional ClothMaximum strength in one directionWeak perpendicular to fibersBeams, rails, blades, long pullsPerfect for directional load cases
Surface VeilUV, corrosion & cosmetic protectionNot structuralWeather-facing parts, tanks, and rooftopsDelivers durability and appearance control

The tech circles “veil” twice.
“That one,” the supervisor says, “saves more jobs than all the others combined.”


Design Desk Scene — Three Jobs, Three Material Families

The supervisor leads the tech to the design desk. Sunlight hits the drawings, and suddenly the materials table feels more real. “Charts teach theory,” he says. “Jobs teach truth.”

Order 1: Marine Deck Hatch

  • Risks: Salt, UV, flex.
    • Build: Veil → Mat → Cloth (0/90) → Roving ribs.
    • Reason: Veil keeps chalking away, cloth keeps deck steady, roving handles slam loads.

The tech traces the load paths on the drawing—finally seeing why the cloth’s 0/90 orientation matters.

Order 2: Corrosion-Resistant Sump Cover

  • Risks: Chemicals, constant moisture, heat.
    • Build: Chemical-resistant veil → Mat → Cross-woven cloth.
    • Reason: Veil blocks attack, mat maintains surface integrity, cloth locks shape under thermal swings.

Order 3: Lightweight Conveyor Shroud

  • Risks: Vibration, dust, constant motion.
    • Build: Veil → UD along vibration axis → Mat for damping.
    • Reason: UD resists directional fatigue; mat absorbs micro-vibration to prevent cracking.

“You’re not choosing materials,” the supervisor says. “You’re choosing survival strategies.”


How They Behave Under Stress — A Shop-Floor Demo

Heat lamp on. Timer running.

Test 1: Flexing

  • Mat sample: Bends smoothly.
  • Cloth sample: Bends, then pushes back.
  • UD sample: Barely bends one way, collapses the other.
    The tech finally sees why UD demands respect—unstoppable in one direction, fragile in another.

Test 2: Heat

  • Veil sample: Surface stays consistent; no chalking.
  • Roving sample: Warms slowly; stiffness remains.
    “See?” the supervisor says. “Weather isn’t gentle. Pick materials that won’t beg for shade.”

Test 3: Impact

  • Mat-only piece: Dents mildly.
  • Cloth + roving piece: Springs back—no cracks.
    The tech nods: “So stiffness is insurance.” “Exactly,” the supervisor replies.

“Properties aren’t numbers,” the supervisor says. “They’re reactions.”


Lay-Up Walkthrough — Putting the Materials to Work

Tools arranged. Resin at 71°F. Stopwatch ready.

  1. Veil first
    Because protection is a front-line job, not an afterthought.
  2. Mat layer
    Watch for that “glassy bloom” that says saturation is perfect.
  3. Cloth orientation
    Align fibers with expected load:
  • Long spans → fibers lengthwise
  • Twist-prone shapes → 45° bias
  1. Roving or UD where needed
    Only where structure demands—not everywhere out of habit.
  2. Green trim
    Edges snap crisp at just the right moment.

The tech hears the roller shift from hiss to purr—the universal signal that things are going right.


Safety Snapshot — Every Material Has Its Own Risks

As the laminate grows, the tech feels the familiar itch creeping up their arms, and the sharp styrene note settles briefly in the air. “The materials talk,” the supervisor says. “Safety talks louder.”

HazardWhat Causes ItMaterial Most InvolvedFix
Itch & microfibersCutting mat or clothMat, clothSleeves, vac-shroud sanding
Heavy resin demandThick fibersRoving, UDMix smaller batches, steady feed
Air pocketsStiff materials in cornersCloth, rovingPre-cut darts, smaller plies
Print-throughFiber too close to the surfaceCloth, rovingAdd a veil or low-profile mat

“Material mistakes don’t wait for QA,” the supervisor says. “They show up immediately—if you’re looking.”


Troubleshooting — When Layers Tell You What Went Wrong

During QC, the tech spots a faint wave in the laminate—barely visible, but there. “What’s it saying?” the supervisor asks.

The tech takes a breath. “Coarse fiber near the surface. Needed veil.”

For the first time today, the supervisor doesn’t correct them—he just nods.

Symptom: Wavy surface after cure

Cause: Roving too close to gelcoat
Fix: Insert veil + mat buffer

Symptom: Edge cracking during demolding

Cause: UD not carried far enough around the corner
Fix: Extend UD wrap or switch to bias cloth

Symptom: Dry white streaks

Cause: Under-wetted cloth or mat starved by neighboring roving
Fix: Use staggered layering and slower resin feed

Symptom: Print-through days later

Cause: Cure shrinkage + coarse fibers near the surface
Fix: Post-cure cycle + surface veil next time


Field Proof — Why Material Choice Pays Off Later

A month after install, the tech gets a text:

“Shrouds survived vibration tests. No micro-cracks. Customer approved full run.”

The tech stares at the message longer than necessary—because the reinforcement schedule they chose is the reason the part survived.

Material selection is invisible to users—but unforgettable to builders.


Inspection & Sign-Off — The Final Check

Under LED lights:

  • Veil coverage: continuous, no bare patches
  • Mat wet-out: uniform gloss
  • Cloth alignment: no drift
  • Roving/UD: properly nested
  • Cure log: recorded
  • Tap test: bright ring.

“Sign only what you’d bolt onto your own machinery,” the supervisor says, handing over the pen. This time, the tech signs without hesitation.


FAQs—Common Questions About the Different Types of Fiberglass Materials

  • Which fiberglass reinforcement is strongest?

Unidirectional offers the highest directional strength. For multi-directional loads, cloth or roving is more balanced.

  • What’s the best reinforcement for tight corners?

Chopped strand mat. Its random fibers conform easily without bridging.

  • Why would I use a veil if it adds no strength?

Because it protects the laminate from UV, chemicals, and print-through, making strong parts last.

  • Is roving always necessary for structural panels?

No. Use roving when you need stiffness across a span. Otherwise, cloth may handle the load with less resin demand.

  • Can I mix multiple types in one laminate?

Yes—most real laminates are hybrids. Strength, finish, and durability often require combining veil, mat, cloth, roving, and UD.

  • How do I prevent print-through?

Veil first, followed by mat. Keep coarse fibers away from the cosmetic face.


Wrap-Up — Materials Aren’t Chosen, They’re Justified

The tech looks back at the original lineup of reinforcements on the cart. What once seemed like five anonymous fabrics now feels like five specialists—each with a role, a strength, and a limit.

By the end of the shift, the tech can feel the difference between materials without even looking:

  • Mat whispers when it’s wet enough.
  • Cloth tightens under the roller.
  • Roving thuds when it settles.
  • UD pulls straight before resin ever hits it.
  • Veil disappears—but protects everything behind it.

That’s the real education behind the different types of fiberglass materials:
Not memorizing names—understanding behaviors.


Featured Materials and Tools

Wanna grab all the gear?

Explore reinforcement fabrics, surface veils, FR resins, woven cloth, rollers, and more directly at PMI Composites’ online shop.

Search for products

Back to Top
Product has been added to your cart